You’ve got hits

Look what you turned up—2,596 dies waiting for you.

Scroll through the list, compare photos and values, and open any die for the full story. Take your time—you’re in the right place.

(sponsored)

Catalog results

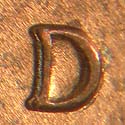
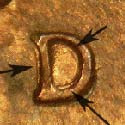
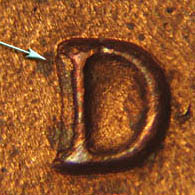
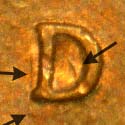
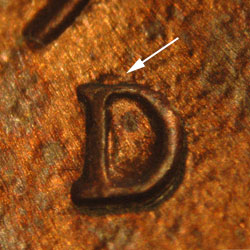
Pre-attribution photo for 1986D•1MM•011

1986D•1MM•011

D/D North

Doubling noted to the top and inside vertical bar of D

Cross references

  • WEXLER: WRPM-006
  • CONECA: RPM-011

All prices and market estimates are for informational and educational purposes only. They are not appraisals, guarantees, or offers to buy or sell. See the Terms of Use for the full Price Guide and Valuation Disclaimer.

F12
VF20
EF40
AU50
UNC
ChBU
GemBU
2.00
3.75
5.00
7.50
9.00
12.00
20.00
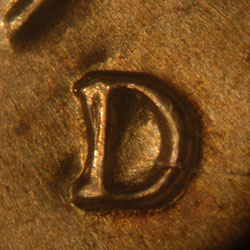
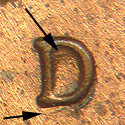
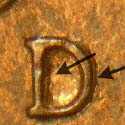
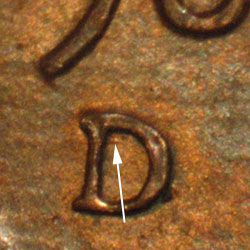
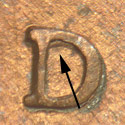
Pre-attribution photo for 1986D•1MM•012

1986D•1MM•012

D/D Rotated CCW

Very prominent doubling on upper serif and vertical bar.

Cross references

  • WEXLER: WRPM-008
  • CONECA: RPM-012

All prices and market estimates are for informational and educational purposes only. They are not appraisals, guarantees, or offers to buy or sell. See the Terms of Use for the full Price Guide and Valuation Disclaimer.

F12
VF20
EF40
AU50
UNC
ChBU
GemBU
4.00
5.00
7.50
12.00
20.00
25.00
30.00
No pre image

1986D•1MM•013

D/D Rotated CCW

Nothing noted.

Cross references

  • CONECA: RPM-013

All prices and market estimates are for informational and educational purposes only. They are not appraisals, guarantees, or offers to buy or sell. See the Terms of Use for the full Price Guide and Valuation Disclaimer.

F12
VF20
EF40
AU50
UNC
ChBU
GemBU
2.00
3.75
5.00
7.50
9.00
12.00
18.00
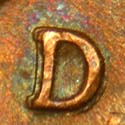
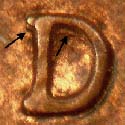
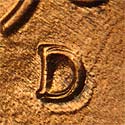
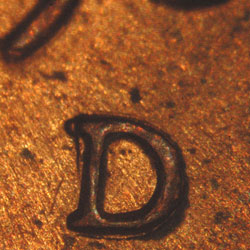
Pre-attribution photo for 1986D•1MM•014

1986D•1MM•014

D/D West

Very strong and well struck portions of the secondary mintmark can be seen outside the vertical bar and inside the primary mintmark.

Cross references

None on file.

All prices and market estimates are for informational and educational purposes only. They are not appraisals, guarantees, or offers to buy or sell. See the Terms of Use for the full Price Guide and Valuation Disclaimer.

F12
VF20
EF40
AU50
UNC
ChBU
GemBU
3.00
5.00
7.00
10.00
13.00
17.00
23.00
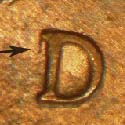
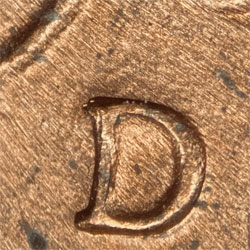
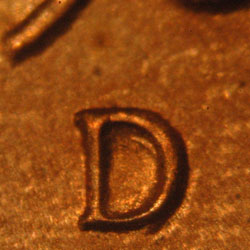
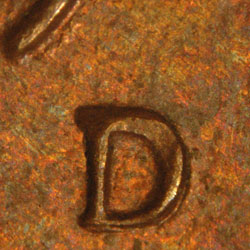
Pre-attribution photo for 1986D•1MM•015

1986D•1MM•015

D/D South

Portions of the secondary mintmark are visible inside and below the primary mintmark.

Cross references

None on file.

All prices and market estimates are for informational and educational purposes only. They are not appraisals, guarantees, or offers to buy or sell. See the Terms of Use for the full Price Guide and Valuation Disclaimer.

F12
VF20
EF40
AU50
UNC
ChBU
GemBU
3.00
5.00
7.00
10.00
13.00
16.00
20.00
Pre-attribution photo for 1986D•1MM•016

1986D•1MM•016

D/D West

A nice spread to the west shows on this repunched mintmark.

Cross references

None on file.

All prices and market estimates are for informational and educational purposes only. They are not appraisals, guarantees, or offers to buy or sell. See the Terms of Use for the full Price Guide and Valuation Disclaimer.

F12
VF20
EF40
AU50
UNC
ChBU
GemBU
3.00
5.00
7.00
10.00
13.00
16.00
20.00
Pre-attribution photo for 1986D•1MM•017

1986D•1MM•017

D/D West

A small portion of a secondary mintmark can be seen to the left of the upper serif.

Cross references

None on file.

All prices and market estimates are for informational and educational purposes only. They are not appraisals, guarantees, or offers to buy or sell. See the Terms of Use for the full Price Guide and Valuation Disclaimer.

F12
VF20
EF40
AU50
UNC
ChBU
GemBU
2.00
3.75
5.00
7.50
9.00
12.00
18.00
Pre-attribution photo for 1986D•1MM•018

1986D•1MM•018

D/D West

Doubling of the mintmark can be seen inside and to the left of the primary mintmark.

Cross references

None on file.

All prices and market estimates are for informational and educational purposes only. They are not appraisals, guarantees, or offers to buy or sell. See the Terms of Use for the full Price Guide and Valuation Disclaimer.

F12
VF20
EF40
AU50
UNC
ChBU
GemBU
2.00
3.75
5.00
7.50
9.00
12.00
18.00
Pre-attribution photo for 1986D•1MM•019

1986D•1MM•019

D/D East

Portions of the secondary mint mark can be seen inside and to the east of the primary mint mark.

Cross references

None on file.

All prices and market estimates are for informational and educational purposes only. They are not appraisals, guarantees, or offers to buy or sell. See the Terms of Use for the full Price Guide and Valuation Disclaimer.

F12
VF20
EF40
AU50
UNC
ChBU
GemBU
2.00
3.75
5.00
7.50
9.00
12.00
18.00
Pre-attribution photo for 1986D•1MM•020

1986D•1MM•020

D/D South

Portions of the secondary mint mark can be seen under the upper serif, and inside the upper primary mint mark. Delisted by CONECA

Cross references

  • WEXLER: WRPM-011
  • CONECA: RPM-004

All prices and market estimates are for informational and educational purposes only. They are not appraisals, guarantees, or offers to buy or sell. See the Terms of Use for the full Price Guide and Valuation Disclaimer.

F12
VF20
EF40
AU50
UNC
ChBU
GemBU
2.00
3.75
5.00
7.50
9.00
12.00
18.00
Pre-attribution photo for 1986D•1MM•021

1986D•1MM•021

D/D Tilted

Nice D/D tilted with minor splitting on top left corner.

Cross references

None on file.

All prices and market estimates are for informational and educational purposes only. They are not appraisals, guarantees, or offers to buy or sell. See the Terms of Use for the full Price Guide and Valuation Disclaimer.

F12
VF20
EF40
AU50
UNC
ChBU
GemBU
2.00
3.75
5.00
7.50
10.00
14.00
18.00
Pre-attribution photo for 1987D•1MM•001

1987D•1MM•001

D/D West

A strong portion of the vertical bar of the secondary mintmark shows on this repunched mintmark.

Cross references

  • WEXLER: WRPM-002
  • CONECA: RPM-001
  • CRAWFORD: CRPM-003

All prices and market estimates are for informational and educational purposes only. They are not appraisals, guarantees, or offers to buy or sell. See the Terms of Use for the full Price Guide and Valuation Disclaimer.

F12
VF20
EF40
AU50
UNC
ChBU
GemBU
3.00
5.00
7.50
10.00
14.00
18.00
27.50
Pre-attribution photo for 1987D•1MM•002

1987D•1MM•002

D/D South

This RPM can easily be confused for die deterioration that is often seen on copper plated zinc coinage.

Cross references

  • WEXLER: WRPM-009
  • CONECA: RPM-002

All prices and market estimates are for informational and educational purposes only. They are not appraisals, guarantees, or offers to buy or sell. See the Terms of Use for the full Price Guide and Valuation Disclaimer.

F12
VF20
EF40
AU50
UNC
ChBU
GemBU
2.00
3.75
5.00
7.50
10.00
15.00
20.00
Pre-attribution photo for 1987D•1MM•003

1987D•1MM•003

D/D North

A noticeable spread shows on both the top and bottom of the mintmark.

Cross references

  • WEXLER: WRPM-003
  • CONECA: RPM-003
  • FIVAZ/STANTON: FS-501

All prices and market estimates are for informational and educational purposes only. They are not appraisals, guarantees, or offers to buy or sell. See the Terms of Use for the full Price Guide and Valuation Disclaimer.

F12
VF20
EF40
AU50
UNC
ChBU
GemBU
2.00
3.75
5.00
15.00
50.00
80.00
150.00
Pre-attribution photo for 1987D•1MM•004

1987D•1MM•004

D/D South

The doubling seen inside the D is often confused with zinc pulling away from the device. Look to the south of the primary D and you will see the secondary mintmark.

Cross references

  • WEXLER: WRPM-004
  • CONECA: RPM-004

All prices and market estimates are for informational and educational purposes only. They are not appraisals, guarantees, or offers to buy or sell. See the Terms of Use for the full Price Guide and Valuation Disclaimer.

F12
VF20
EF40
AU50
UNC
ChBU
GemBU
3.50
5.00
8.00
12.00
20.00
30.00
40.00
Pre-attribution photo for 1987D•1MM•005

1987D•1MM•005

D/D Southwest

Almost a complete secondary mintmark can be seen in, and to the southwest of the primary mint mark.

Cross references

  • WEXLER: WRPM-008
  • CONECA: RPM-005

All prices and market estimates are for informational and educational purposes only. They are not appraisals, guarantees, or offers to buy or sell. See the Terms of Use for the full Price Guide and Valuation Disclaimer.

F12
VF20
EF40
AU50
UNC
ChBU
GemBU
3.00
5.00
7.50
10.00
15.00
20.00
25.00
Pre-attribution photo for 1987D•1MM•006

1987D•1MM•006

D/D South

A strong portion of the secondary mintmark's upper curve can be seen inside the primary mintmark.

Cross references

  • WEXLER: WRPM-011
  • CONECA: RPM-006

All prices and market estimates are for informational and educational purposes only. They are not appraisals, guarantees, or offers to buy or sell. See the Terms of Use for the full Price Guide and Valuation Disclaimer.

F12
VF20
EF40
AU50
UNC
ChBU
GemBU
2.00
3.75
5.00
8.00
12.00
15.00
22.00
Pre-attribution photo for 1987D•1MM•007

1987D•1MM•007

D/D West

Strong doubled mintmark seen to upper left serif and vertical bar

Cross references

  • WEXLER: WRPM-012
  • CONECA: RPM-007

All prices and market estimates are for informational and educational purposes only. They are not appraisals, guarantees, or offers to buy or sell. See the Terms of Use for the full Price Guide and Valuation Disclaimer.

F12
VF20
EF40
AU50
UNC
ChBU
GemBU
3.50
5.00
7.50
10.00
15.00
30.00
40.00
Pre-attribution photo for 1987D•1MM•008

1987D•1MM•008

D/D South

Nothing noted.

Cross references

  • WEXLER: WRPM-016
  • CONECA: RPM-008
  • CRAWFORD: CRPM-013

All prices and market estimates are for informational and educational purposes only. They are not appraisals, guarantees, or offers to buy or sell. See the Terms of Use for the full Price Guide and Valuation Disclaimer.

F12
VF20
EF40
AU50
UNC
ChBU
GemBU
2.00
3.75
5.00
7.50
9.00
15.00
25.00
Pre-attribution photo for 1987D•1MM•009

1987D•1MM•009

D/D West

A nice variety that clearly shows the secondary mintmark inside and to the left of the primary mintmark.

Cross references

  • WEXLER: WRPM-013
  • CONECA: Delisted

All prices and market estimates are for informational and educational purposes only. They are not appraisals, guarantees, or offers to buy or sell. See the Terms of Use for the full Price Guide and Valuation Disclaimer.

F12
VF20
EF40
AU50
UNC
ChBU
GemBU
2.00
3.75
5.00
10.00
12.00
15.00
25.00

1986D•1MM•011

D/D North

Pre-attribution photo for 1986D•1MM•011

Doubling noted to the top and inside vertical bar of D

Read more

Doubling noted to the top and inside vertical bar of D

1986D•1MM•012

D/D Rotated CCW

Pre-attribution photo for 1986D•1MM•012

Very prominent doubling on upper serif and vertical bar.

Read more

Very prominent doubling on upper serif and vertical bar.

1986D•1MM•013

D/D Rotated CCW

No pre image

Nothing noted.

Read more

Nothing noted.

1986D•1MM•014

D/D West

Pre-attribution photo for 1986D•1MM•014

Very strong and well struck portions of the secondary mintmark can be seen outside the vertical bar and inside the primary mintmark.

Read more

Very strong and well struck portions of the secondary mintmark can be seen outside the vertical bar and inside the primary mintmark.

1986D•1MM•015

D/D South

Pre-attribution photo for 1986D•1MM•015

Portions of the secondary mintmark are visible inside and below the primary mintmark.

Read more

Portions of the secondary mintmark are visible inside and below the primary mintmark.

1986D•1MM•016

D/D West

Pre-attribution photo for 1986D•1MM•016

A nice spread to the west shows on this repunched mintmark.

Read more

A nice spread to the west shows on this repunched mintmark.

1986D•1MM•017

D/D West

Pre-attribution photo for 1986D•1MM•017

A small portion of a secondary mintmark can be seen to the left of the upper serif.

Read more

A small portion of a secondary mintmark can be seen to the left of the upper serif.

1986D•1MM•018

D/D West

Pre-attribution photo for 1986D•1MM•018

Doubling of the mintmark can be seen inside and to the left of the primary mintmark.

Read more

Doubling of the mintmark can be seen inside and to the left of the primary mintmark.

1986D•1MM•019

D/D East

Pre-attribution photo for 1986D•1MM•019

Portions of the secondary mint mark can be seen inside and to the east of the primary mint mark.

Read more

Portions of the secondary mint mark can be seen inside and to the east of the primary mint mark.

1986D•1MM•020

D/D South

Pre-attribution photo for 1986D•1MM•020

Portions of the secondary mint mark can be seen under the upper serif, and inside the upper primary mint mark. Delisted by CONECA

Read more

Portions of the secondary mint mark can be seen under the upper serif, and inside the upper primary mint mark. Delisted by CONECA

1986D•1MM•021

D/D Tilted

Pre-attribution photo for 1986D•1MM•021

Nice D/D tilted with minor splitting on top left corner.

Read more

Nice D/D tilted with minor splitting on top left corner.

1987D•1MM•001

D/D West

Pre-attribution photo for 1987D•1MM•001

A strong portion of the vertical bar of the secondary mintmark shows on this repunched mintmark.

Read more

A strong portion of the vertical bar of the secondary mintmark shows on this repunched mintmark.

1987D•1MM•002

D/D South

Pre-attribution photo for 1987D•1MM•002

This RPM can easily be confused for die deterioration that is often seen on copper plated zinc coinage.

Read more

This RPM can easily be confused for die deterioration that is often seen on copper plated zinc coinage.

1987D•1MM•003

D/D North

Pre-attribution photo for 1987D•1MM•003

A noticeable spread shows on both the top and bottom of the mintmark.

Read more

A noticeable spread shows on both the top and bottom of the mintmark.

1987D•1MM•004

D/D South

Pre-attribution photo for 1987D•1MM•004

The doubling seen inside the D is often confused with zinc pulling away from the device. Look to the south of the primary D and you will see the secondary mintmark.

Read more

The doubling seen inside the D is often confused with zinc pulling away from the device. Look to the south of the primary D and you will see the secondary mintmark.

1987D•1MM•005

D/D Southwest

Pre-attribution photo for 1987D•1MM•005

Almost a complete secondary mintmark can be seen in, and to the southwest of the primary mint mark.

Read more

Almost a complete secondary mintmark can be seen in, and to the southwest of the primary mint mark.

1987D•1MM•006

D/D South

Pre-attribution photo for 1987D•1MM•006

A strong portion of the secondary mintmark's upper curve can be seen inside the primary mintmark.

Read more

A strong portion of the secondary mintmark's upper curve can be seen inside the primary mintmark.

1987D•1MM•007

D/D West

Pre-attribution photo for 1987D•1MM•007

Strong doubled mintmark seen to upper left serif and vertical bar

Read more

Strong doubled mintmark seen to upper left serif and vertical bar

1987D•1MM•008

D/D South

Pre-attribution photo for 1987D•1MM•008

Nothing noted.

Read more

Nothing noted.

1987D•1MM•009

D/D West

Pre-attribution photo for 1987D•1MM•009

A nice variety that clearly shows the secondary mintmark inside and to the left of the primary mintmark.

Read more

A nice variety that clearly shows the secondary mintmark inside and to the left of the primary mintmark.

(sponsored)